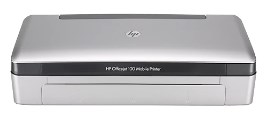
Download HP Officejet 100 Firmware that compatible with your operating system
HP Officejet 100 Firmware - L411a/L411b Firmware for Windows
DescriptionThis firmware upgrade is for HP Officejet 100 Mobile Printer - L411a/L411b
Fixed Issues:
- To improve print quality.
- Enable borderless printing for Bluetooth connection.
- Improve performance when printing borderless.
- Improved power management through Auto Off feature for printers connected to power supply: The following sections describes how it can be managed.
- Improve carriage reliability.
Type: Firmware
Version: ALR1FA1535AR
Release date: Apr 12, 2018
Filename: OJ100_L411_R1535A.exe
Download
File Size:(5.6 MB)
Operating Systems:
Microsoft Windows 10 (32-bit)
Microsoft Windows 10 (64-bit)
Microsoft Windows 7 (32-bit)
Microsoft Windows 7 (64-bit)
Microsoft Windows 8 (32-bit)
Microsoft Windows 8 (64-bit)
Microsoft Windows 8.1 (64-bit)
Microsoft Windows Vista (32-bit)
Microsoft Windows Vista (64-bit)
Microsoft Windows XP (32-bit)
Also Update Driver:
HP ENVY 4520 Basic Driver for Windows
HP ENVY 5530 Driver for Windows
HP ENVY 4520 Utility

HP Officejet 100 Firmware Installation Instructions
HP Device Update Installation InstructionsBefore Starting:
- Install your printer using FULL feature solution or BASIC solution.
- Make sure that your printer is not in an error state(Paper Jam etc)
- If your printer front panel is unresponsive, disconnect and reconnect power, and restart.
- If your printer is connected using a wireless connection and this update fails to install, please connect your printer to your PC with a USB cable and try again. You can switch back to using your wireless connection after the update is complete (see instructions below).
- Download the HP Device Update exe file to an appropriate location on your system.
- Double click on the downloaded file to start the extraction and installation.
- In Windows Vista or Windows 7 operating systems, you may be prompted to enter Administrator credentials if your login privileges do not have administrator rights. If you are an administrator, you may be prompted for permission to continue with the installation. Please select to continue the process.
- Follow the on-screen instructions to perform the installation. If you see the success screen with the following message at the end of the installation, "Device Update Successful", press the "Close" button to finish the printer update.
Do not interrupt the printer during the upgrade process. The printer may be damaged if power is interrupted during the firmware upgrade process.
Note: If your printer was originally installed using wireless connection and you switched to a USB connection to install this update, follow these steps to change the "Default Printer" setting to restore the wireless connection as the default printer.
- Navigate to the operating system "Printers" or "Devices and Printers" folder (varies based on your operating system).
- Right-click on the printer you would like to set as default printer. Select the "Set as default printer" option.
- (Optional) Additionally, you can delete the printer icon for the USB printer connection you created. The additional icon for the USB connection to the printer will not harm your system, but will not be a functional connection for your printer unless you leave the USB cable connected. To delete, find the printer icon connected through USB in the "Printers" or "Devices and Printers" folder. Right-click on the printer icon and select "Delete". Please make sure that your wireless connected printer is working before deleting the USB printer icon.
0 komentar:
Post a Comment